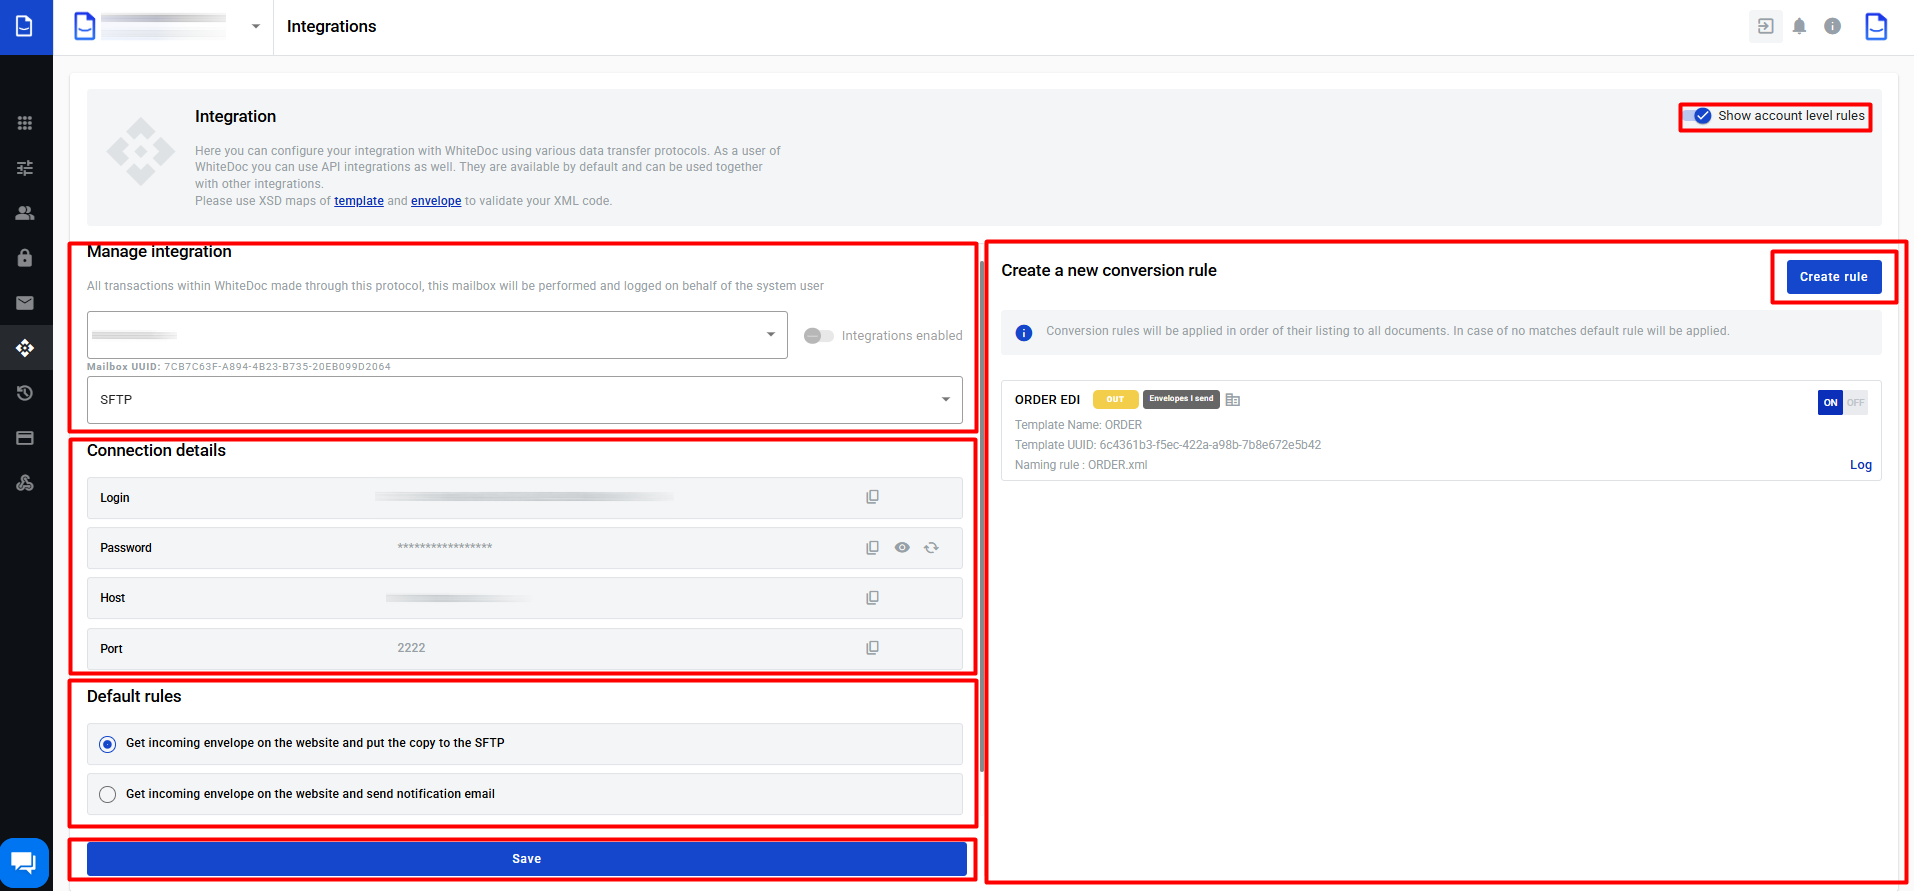
Integrations can be enabled on the integrations page using the Show account rules toggle (1).
Integration for all mailboxes in the same account can be configured on this page. When a user opens this page and has a mailbox, all fields will be pre-filled (except: Notify by email).
.png)
Integration management
In the Manage integration block (2), the client can customise integration properties:
-
mailbox for integration
-
connection protocol
-
email address
If the client has more than one mailbox in this account, they can change the mailbox for integration in the first field selection. In the second field selection, the client can provide the connection protocol. Depending on this selection will be changed Connection details (3) block. In the third field, the client can provide the email address where will be send all notifications related to integrations. Also, this email will be used in the second default rule.
Connection details
-
For the SFTP protocol, all data except the password in the Connection details (3) block is automatically generated. The password is generated after the Save button is clicked. The credentials from this block should be used for connection to the FTP server. Each parameter can be copied by clicking the Copy button. The new password can be created by the Reset button.
-
For the AS2 protocol, only the Self URL and Self certificate will be generated automatically; the rest of the parameters should be filled in manually.
Default rules
-
Get the incoming envelope on the platform and put a copy on the remote server
-
Get the incoming envelope on the platform and send a notification email
-
Auto-reject the incoming envelopes
If the incoming documents don’t match any created conversion rules, default rules will be applied to the incoming documents. It can be selected from 3 predefined options. If the third rule is selected, the reject reason can be specified, and all incoming documents will be rejected with this reason.
Conversion rules list
The conversion rule list is empty by default. To create a new rule, click the Add new rule button to open the rule creation form. All new rules will be shown on this list. The user can enable or disable each rule from this list. Existing rules can be updated, cloned and deleted. It is done in a rule properties form, which is opened by clicking the rule name. To save changes, click the Save (7) button.