Single Sign-On (SSO) is an authentication method that enables users to securely log in to various applications, platforms, or websites using a single set of credentials. SSO functions based on a trust relationship between a service provider application and an identity provider (IdP) such as Google, Okta, OneLogin, or Microsoft AD FS. This trust is typically established through a certificate exchanged between the IdP and the service provider:

Benefits of using SSO:
-
Users benefit from not needing to remember multiple passwords, as they can use their existing credentials for authentication.
-
Your existing IdP remains the primary system for user authentication.
-
There’s no need to synchronise passwords with your IdP provider.
In WhiteDoc, you can configure Single Sign-On to allow employees to access WhiteDoc through their Identity Provider (IdP), removing the need for passwords during the login process, ensuring secure and quick access.
WhiteDoc's single sign-on system is based on Security Assertion Markup Language 2.0 (SAML 2.0), which is the leading industry standard for exchanging authentication and authorisation data across web applications.
In the 'SSO providers' tab, you can add your SSO providers to set up SSO authentication for corporate users. To 'Create an SSO provider', click on the corresponding button and complete the fields in the modal window:
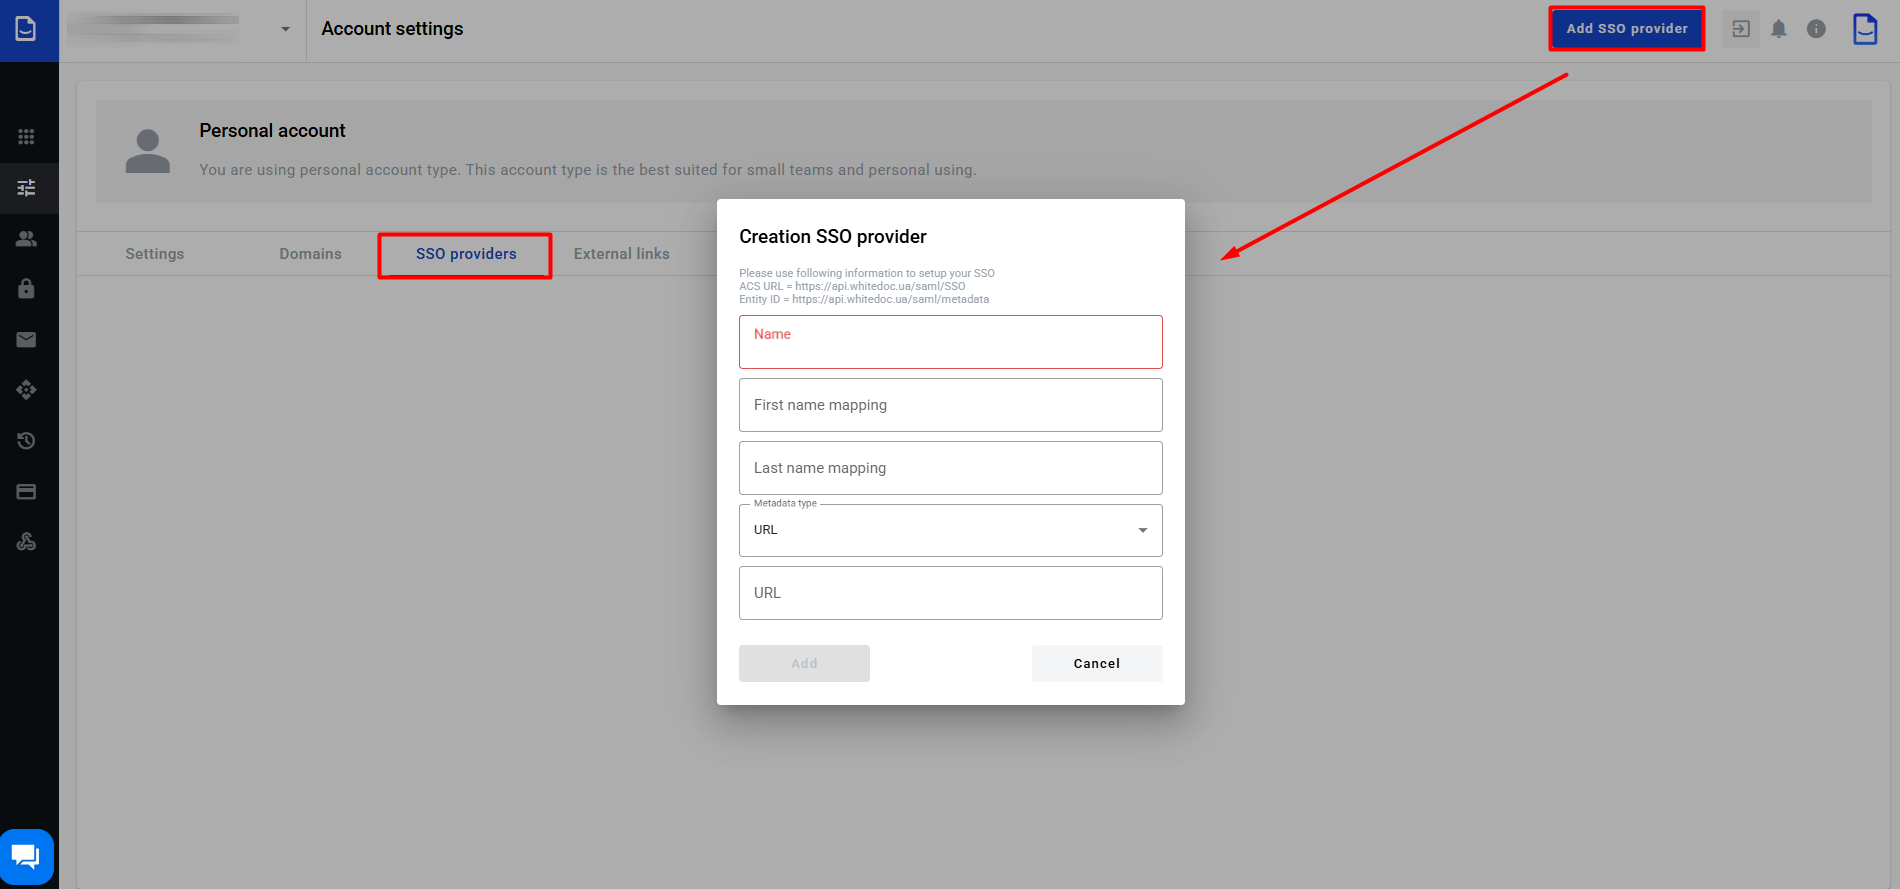
You can choose the type of metadata (URL or XML). After filling out the details, click ‘Add’.
The providers added this way can be edited  or deleted
  (although deletion requires confirmation)

Configuring on the Azure Side
To proceed, register the application in the Azure Active Directory (Azure AD) with a corporate identity management administrator account.

Then navigate to the menu and go to ‘Enterprise apps’ -> ‘New app’ -> ‘Create a custom app’


Once the application is added and visible in the ‘Enterprise apps’ list.
Configure SAML (Single Sign-On options) by selecting ‘Single sign-on’ in the ‘Management’ section and then choosing SAML.

Next, you need to configure the Single Sign-on parameters
Basic SAML Configuration
-
Identifier (Entity ID) = https://api.whitedoc.ua/saml/metadata
-
Response URL = https://api.whitedoc.ua/saml/SSO

After adding the URLs and saving the basic configuration, these settings will be available in the system:
- Attributes and Validations
-
SAML certificates
You will need to configure the SSO connection in WhiteDoc as follows
- First Name Match = user.givenname
- Surname Match = user.surname
- Phone number match = user.mail


Next, in the SAML Certificates section, upload the XML file.
To finalise the settings on the WhiteDoc side, when creating an SSO provider, select the ‘XML’ metadata type, copy and paste the content from the previously uploaded Azure metadata file, and click the ‘Add’ button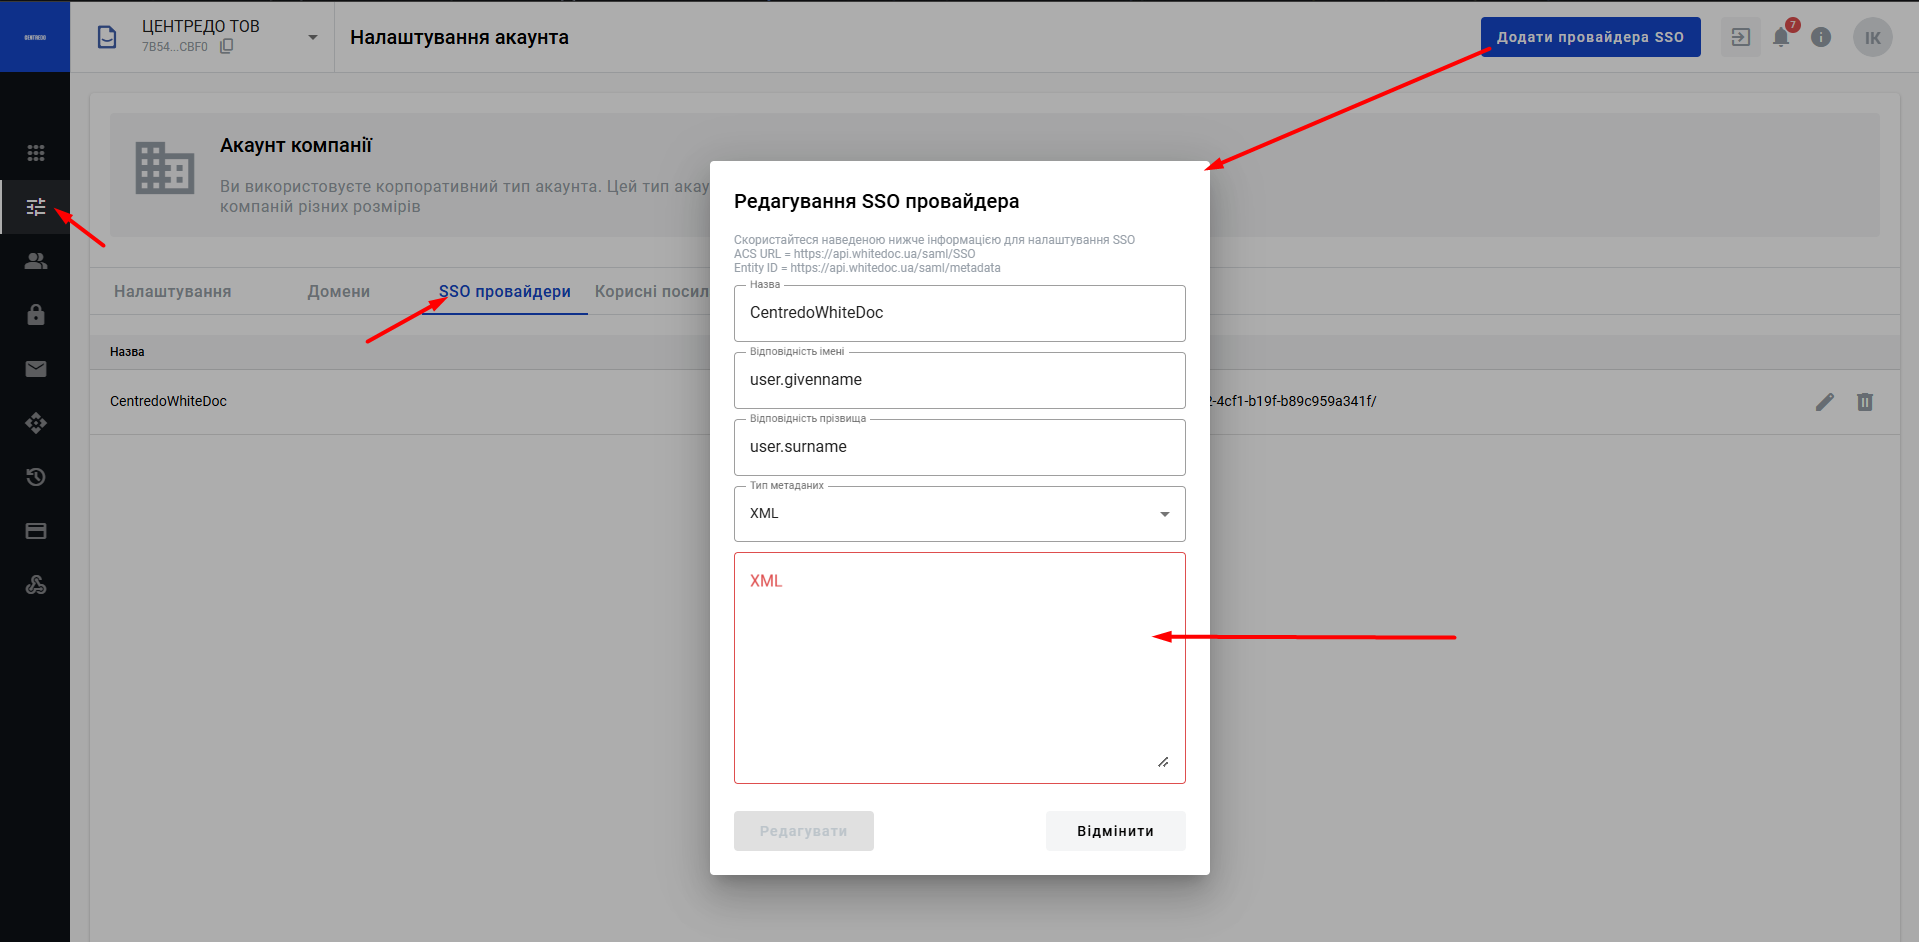
SSO provider is successfully created

Next, ensure that you enable SSO in the Domain settings